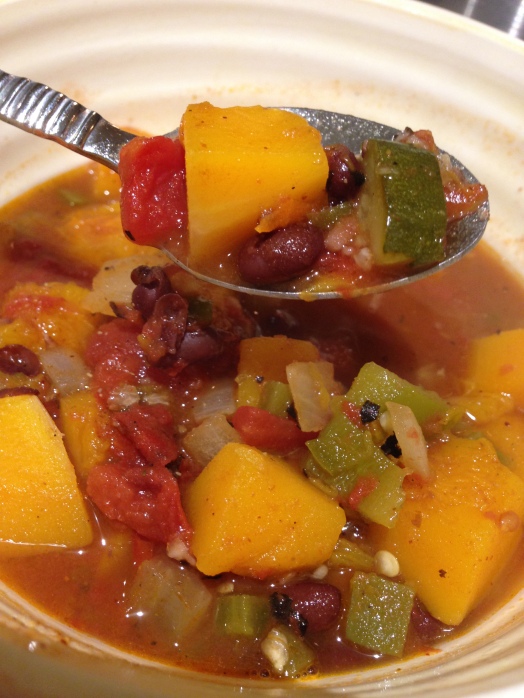
Vegan Butternut Squash & Black Bean Chili (Crockpot)

I hope, my wonderful, tolerant readers, you do not feel used and abused.

It has, once again, been ages since my last post. So much has happened…. Work has somehow gotten busier and I began grad school. (Because I had soooo much free time to begin with…) The days when I began this blog, days when I had hours each day to spend playing in the kitchen and exploring new ingredients, are gone. Now, I am lucky if dinner involves more than steam vegetables and lentils and top them with salsa and, if I’m feeling particularly sassy, a little Daiya dairy-free cheese.

Today, however, was the day of the biggest football game in America, and I felt an overwhelming desire to prepare a football worthy feast. I made a small bowl of Guacamole, a delicious vegan crockpot chili, and a batch of gluten free corn muffins, and it was off to the races! …er…. football game.

I like my chili a bit on the soup-y side, so feel free to reduce the amount of vegetable broth to make yours thicker. Other than that, this recipe is a fairly straightforward crockpot dish that will leave your house smelling delicious!

Vegan Butternut Squash & Black Bean Chili

(Gluten-Free, Dairy-Free, Vegan)

 photo 2

Ingredients:

  • 1 Tblsp Olive Oil
  • 5 cloves Garlic, minced
  • 1 Yellow Onion, chopped
  • 1 tsp Chili Powder
  • 1 tsp Cumin
  • 1 tsp Curry Powder
  • 1 tsp Ginger Powder
  • 1 tsp Cinnamon
  • 2 Carrots, chopped
  • 2 ribs Celery, chopped
  • 1 Zucchini, chopped
  • 1 small-medium Butternut Squash, peeled and chopped
  • 2 green Bell Peppers, cored and chopped
  • 2 Jalapeno Peppers, minced
  • Herbamare (or sea salt) and Black Pepper, to taste
  • 2.5 cups Low Sodium Vegetable Broth
  • 28 oz can Fire Roasted Diced Tomatoes
  • 2 tsp Rice Wine Vinegar
  • 1 Tblsp Agave Nectar
  • 1 Tblsp Lime Juice, about 1/2 a small lime
  • Zest of 1/2 a lime

Directions:

  1. Drizzle olive oil in the bottom of your crock pot. Add garlic, onion, and spices and stir to combine.
  2. Add al remaining ingredients except the lime juice and zest and stir to combine.
  3. Place the lid on your crock pot and set to low.
  4. Cool on low for 6 hours.
  5. Taste and adjust salt, pepper, agave ratio, as needed.
  6. Garnish with lime juice and zest before serving.

Siracha Honey Lime Chicken & Black Bean Pasta with Creamy Cilantro Avocado Sauce

Confession time….

I am writing this post just so I won’t forget this recipe. There are no frills and no pictures, and I’m okay with that. Whew! I’m glad I got that all out on the table. Now we can move on without pretense. 😉

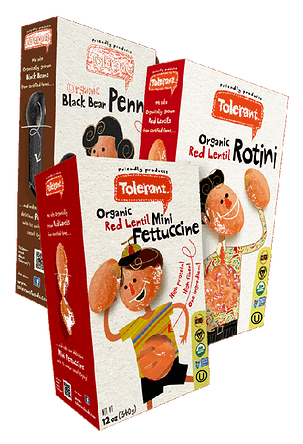
A few days ago, I was given a few varieties of pastas to try made by Tolerant Foods. What makes their products unique is that their pastas are made from one ingredient, beans or legumes! Rich in protein and fiber, these appeared to be an excellent substitute for gluten and carbohydrate laden traditional pastas. Tolerant Foods pastas are also free of all of the major allergens, non-GMO, and organic. It all looked good on paper, but the proof would be in the taste and texture.

b7592c_2601edaac0403b8c7d1be4528a99b0f5.png_srz_303_444_75_22_0.50_1.20_0

First, I decided to try the Black Bean Rotini. Instead of approaching this rotini like I would a more traditional pasta, I decided to focus on what flavors were inherent compliments to black beans. After all, this rotini only had one ingredient, black beans. It was highly unlikely that it would taste like something else. So, what goes with black beans? How about lime, chicken, and Siracha? Yes, yes, and yes, please!

Packed with intense, rich flavor and staggering nutritional value, this recipe is one I plan on duplicating again and again. Winner!

Siracha Honey Lime Chicken & Black Bean Pasta with Creamy Cilantro Avocado Sauce

(Gluten Free, Dairy Free)

Ingredients:

  • 3/4 pounds boneless, skinless Chicken Breasts, cubed
  • 4 Tblsp Bragg’s Liquid Aminos (or GF Soy Sauce)
  • 2 Tblsp Honey
  • 4 tsp Coconut Oil, melted, divided
  • 1/4 tsp Garlic Powder
  • 2 tsp Siracha
  • 1/4 cup plus 2 Tblsp chopped, fresh Cilantro, divided
  • 1/4 tsp Red Pepper Flakes
  • 3 Limes
  • 1/2 yellow Onion, sliced
  • 1 small Green Bell Pepper, sliced
  • 1 large leaf Green Kale, chopped
  • 2 Tomatoes, chopped
  • 1 small Avocado
  • Salt & Pepper, to taste
  • 1/3 cup warm Water
  • 6 oz Tolerant Foods Black Bean Rotini

Directions:

  1. Place chicken in a shallow dish with a lid.
  2. In a small bowl, whisk together the Bragg’s, Honey, 1 Tblsp Coconut Oil, 2 Tblsp chopped Cilantro, Siracha, Red Pepper Flakes, and Garlic Powder. Pour evenly over the chicken.
  3. Squeeze the juice of two limes over the chicken. Cover and marinate in the refrigerator for 3-4 hours.
  4. Once chicken has marinated, begin by boiling water and preparing the pasta according to package instructions.
  5. Meanwhile, melt 1 tsp Coconut Oil in a large skillet over medium heat. Saute’ the onions, peppers, and kale until onions are translucent and kale is wilted. Scoop into a bowl and set aside.
  6. Return the skillet to high heat and add the Chicken and Marinade. Bring to a low boil and cook, turning the chicken occasionally, until cooked through. After marinade is reduced by about half, add half of a chopped tomato.
  7. Once chicken is cooked through, remove to a dish and set aside.
  8. Return the skillet to medium heat and add the remaining chopped tomatoes. Cook until the tomatoes begin to breakdown.
  9. While the tomatoes are cooking, make the creamy cilantro avocado sauce by placing 1/4 cup Cilantro, 1 Avocado (pitted), Salt & Pepper, and the juice of 1/2 a lime in a food processor. Process until roughly chopped. Slowly add 1/4 to 1/3 cup hot water until sauce is thick and smooth.
  10. Add roughly 1/2 of the Cilantro Avocado Sauce to the tomatoes in the skillet and cook until heated through.
  11. To serve, separate the cooked black bean pasta into two bowls and top with sauteed vegetables, chicken, and the warmed mixture of tomatoes and creamy Cilantro Avocado sauce. Bon Appetit!

Product Review: Qrunch Burgers

You many have noticed, my faithful readers, that I have been on a blogging hiatus. Time has not been something I have had an excess of, and, as a result, my blogging time was pushed to the back burner.

It is during times like these that products that help build quick, healthy meals are the most valuable. Enter, Qrunch Burgers!

206760_191930374184668_6244018_n

I was given the opportunity to sample Qrunch Burgers made out of the high protein grain, quinoa, and boy was I impressed. These delicious and versatile patties are gluten free, dairy free, egg free, wheat free, corn free, nut free, low in sodium,  soy free, AND Non-GMO Project verified! Basically, they meet almost every dietary need. 20111015030444-589e94e00000a53

Qrunch Burgers come in a variety of flavors, including Sweet Curry and Spicy Italian, and I had a hard time deciding which flavor to try. Ultimately, GF Guy and I chose to start with the Original flavor in order to get the best idea of what the product was all about.

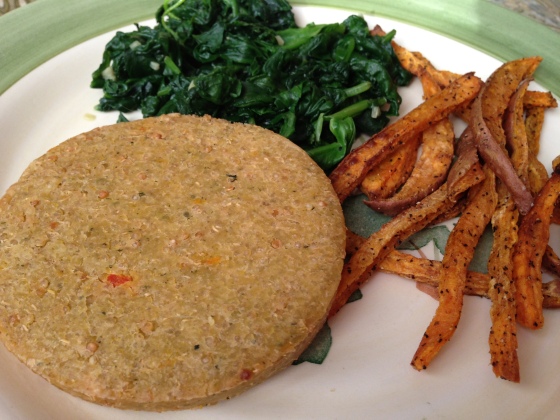
I heated the Original Qrunch Burgers in the oven, according to the package instructions, and served them along side sauteed spinach and baked sweet potato fries.

photo

The first bite was not what I was expecting. Qrunch Burgers are not heavily seasoned or processed tasting, like most of their vegan burger counterparts. Instead, I was pleasantly surprised to find I could actually taste the ingredients! The mild, nutty flavor of quinoa, lightly seasoned with spices was a perfect complement to our meal, especially once topped with Mango Salsa!

To make our experience even better, clean up was a snap! I will definitely purchase Qrunch Burgers again for a quick, week night meal. Next up will be the Curry flavor!

You can find Qrunch Burgers in your local natural food store, Whole Foods, King Soopers, and even Safeway!

Filet Mignon with Dairy-Free Garlic Herb Butter

The Tony Awards were last night.

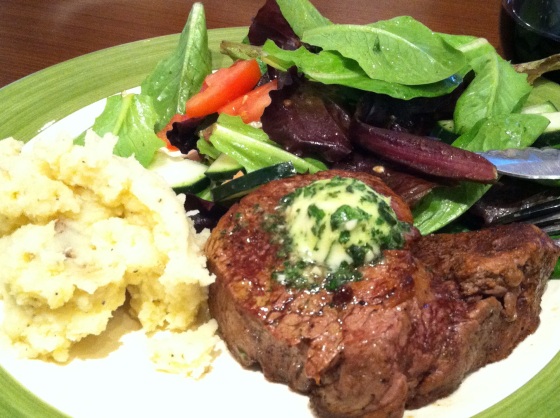
For those of you who don’t know, the Tony’s are basically the Super Bowl of the theater world. GF Guy and I were so excited! We invited a few friends over, and I prepared a dinner worthy of the occasion. I made steak!

I don’ know why I decided that dinner just HAD to be steak. I’ve never actually cooked it before, and really only eat it once a year. But, steak it was, and AMAZING steak it turned out to be! Ready in under 15 minutes, this recipe is a decadent winner. GF Guy was sure pleased. Though, I’m making him eat lentils tonight….. So, there’s that…..

Filet Mignon with Dairy Free Garlic Herb Butter

(Gluten Free, Dairy Free)

photo

Ingredients:

  • 1 stick (8 Tblsp) Earth Balance Buttery Sticks (divided)
  • 2 cloves Garlic
  • 1 Tblsp fresh Italian Parsley
  • 1 Tblsp fresh Basil
  • 4, 8oz Grass-Fed Filet Mignon Steaks
  • Sea Salt
  • Black Pepper
  • 1 tsp Olive Oil

Directions:

  1. Make Dairy-Free Garlic Herb Butter by combining 1/2 stick (4 Tblsp) softened Earth Balance Buttery Sticks, garlic, parsley, & basil in a food processor. Pulse until well combined and smooth.
  2. Turn dairy-free butter onto a sheet of plastic wrap and form into a log shape. Wrap in plastic wrap and store in the refrigerator until ready to cook the steaks.
  3. Preheat your oven to 400 degrees F. (425 degrees F if at high altitude)
  4. Heat a large oven-safe skillet over high heat.
  5. Melt remaining 1/2 stick (4 Tblsp) Earth Balance Buttery Stick and Olive Oil in the pan.
  6. Meanwhile, generously season the filets on both sides with salt & pepper. Don’t be shy. Seasoning is your friend!
  7. Once Earth Balance has melted in the pan, sear the steaks 2 1/2 to 3 minutes per side. While steak is searing, use a spoon to bathe filets with the melted Earth Balance in the pan.
  8. Place the entire skillet in the oven and cook for 7 minutes.
  9. While filets are in the oven, remove Dairy-Free Garlic Herb Butter from the refrigerator, and slice into 1/4″ thick rounds.
  10. After 7 minutes, remove the pan from the oven and top each filet with one round of Dairy-Free Garlic Herb Butter.
  11. Return the pan to the oven for 1 minute.
  12. Remove filets from the pan immediately and allow to rest a few minutes before serving.


Vegan Blueberry Corn Muffins

GF Guy is home, and I suddenly feel like baking again!

DSC09579

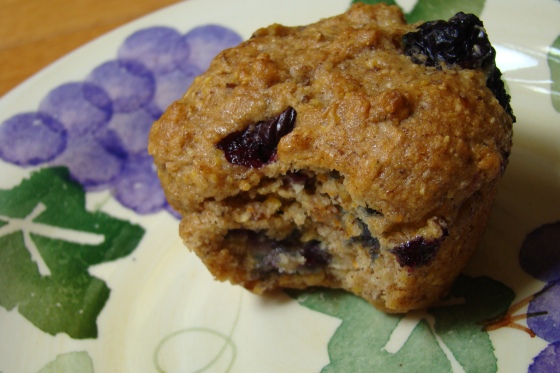
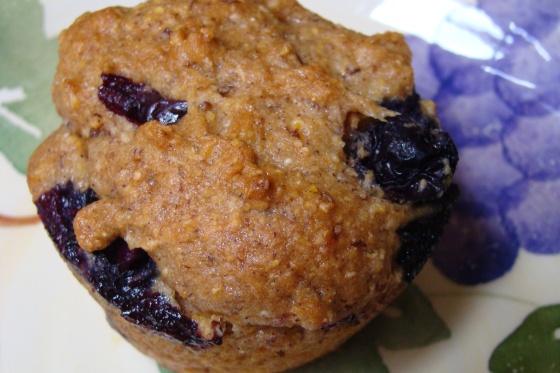
It has been over a year since I last made muffins. His first morning home seemed like the perfect time to pull out the old muffin tin and give it a go. I went to my favorite GF recipe blog, The Gluten Free Goddess, where I found a delicious recipe for hearty, whole grain blueberry muffins.

I made a few changes based on the ingredients I had on hand, as I do. GF Guy and I both LOVED them! My changes are highlighted in red. Feel free to follow the link to view the original recipe, and to check out the Gluten Free Goddess’s other delicious recipes!

Blueberry Corn Muffins

(Gluten Free, Dairy Free, Vegan)

A la Karina the Gluten Free Goddess

DSC09575

Ingredients:

  • 3/4 cup certified Gluten Free Yellow Corn Meal
  • 1/2 cup Brown Rice Flour
  • 1/2 cup Sorghum Flour
  • 1/4 Tapioca Starch
  • 1/4 cup Corn Starch
  • 2 tsp Baking Powder
  • 1/2 tsp Baking Soda
  • 1/2 tsp Sea Salt
  • 1 1/2 tsp Xanthum Gum
  • 1/2 cup Turbinado Sugar
  • 1 tsp Cinnamon
  • 1/4 cup Light Olive Oil
  • 1 Tblsp Organic Honey
  • 2 tsp Bourbon Vanilla Extract
  • 1 tsp Lemon Juice
  • 2 Flax Eggs (2 Tblsp Flax Meal combined with 6 Tblsp warm Water)
  • 1 cup Warm Water (3/4 cup for low altitude cooking)
  • 1 heaping cup fresh, Organic Blueberries

Directions:

  1. Preheat your oven to 375 degrees F. (350 degrees F for low altitude)
  2. Grease a muffin tin with dairy free buttery substitute, like Earth Balance.
  3. In a large bowl, whisk together all dry ingredients.
  4. Add wet ingredients and stir until evenly combined. Adjust liquid ratio as needed. Batter should be thick enough to scoop, but not stiff.
  5. Fold in fresh blueberries.
  6. Scoop batter into greased muffin tin, filling each cup 3/4 of the way full.
  7. Bake in preheated oven 17-20 minutes, until done.
  8. Allow to cool 5-7 minutes in the muffin tin before turning onto a cooling rack.
  9. Enjoy warm with someone you love!

Arroz con Pollo (take 2)

This past weekend was full of family and fun!

My baby brother graduated from college, making me officially old. At least my little sister is still under 14 years old. She will keep me “hip with the kids”!

486786_10102022011843902_1967272860_n

PS – Check out my dad’s epic photo-bomb in the background of this picture!

970945_10102022042652162_1894068849_n

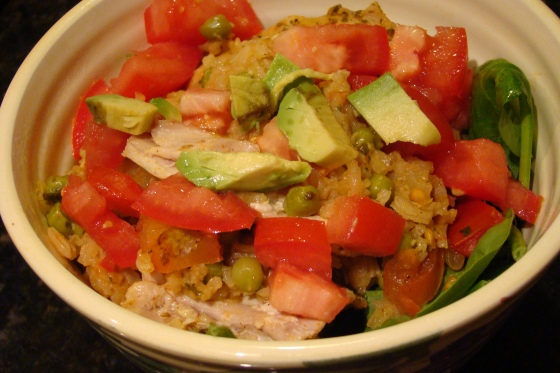
Then, I flew home to spend 24 hours with my husband, GF Guy. In honor of his visit home, I made a second attempt at creating his family’s famous Arroz con Pollo. In sticking with my convictions to avoid processed foods, I skipped the usual yellow rice mix, and made the recipe completely from scratch. My first attempt, a few months ago, was just okay. The recipe was very complex, but, it was missing something.

I think this version is much closer to where it should be. Both GF Guy and I loved it and went back for seconds. And, the chicken to rice ratio was spot on perfect. In our house, that is probably the most import thing when making chicken and yellow rice. There are few things more annoying than ending up with a giant pot of leftover yellow rice and no more chicken.

This version will be a keeper in our house!

Arroz con Pollo

(Gluten Free, Dairy Free)

dsc09448

Ingredients:

  • 1.5 lbs Organic, Chicken Thighs (bone-in, skin on)
  • 2 Bay Leaves
  • 2 tsp Extra Virgin Olive Oil
  • 1/2 Yellow Onion, chopped
  • 1 Green Bell Pepper, julienned
  • 3 cloves Garlic, minced
  • about 2 Tblsp White Wine
  • 1.5 tsp Cumin
  • 1/4 tsp Turmeric
  • pinch Saffron threads
  • 1 tsp dried Oregano
  • 1 Tblsp Tomato Paste
  • 1.5 cups Paella Rice (short grain)
  • 3.5 cups Low Sodium Chicken Stock
  • 1 cup frozen Green Peas
  • Sea Salt and Black Pepper, to taste

Directions:

  1. Bring a large pot of water to a boil. Add 1 bay leaf and chicken thighs to the pot of boiling water and poach 15 minutes.
  2. Remove from heat, drain, and season chicken with salt and pepper. Set seasoned chicken aside.
  3. Place large pot back on the stove over medium high heat. Drizzle olive oil in the bottom of the pot and saute’ onions and bell pepper until soft. Add the garlic and cook until fragrant, about 1 minute.
  4. Quickly, so as not to burn the garlic, deglaze the pan with white wine.
  5. Add the tomato paste and rice.
  6. Add the spices and bay leaf and stir to thoroughly coat all ingredients.
  7. Pour chicken stock into the pot.
  8. Nestle the seasoned chicken thighs in the pot. They should be mostly submerged in the cooking liquid.
  9. Top chicken with the peas, season with salt and pepper, and bring to a boil. Drizzle with a small amount of Extra Virgin Olive Oil.
  10. Reduce the heat to low, cover pot with a lid, and cook 20-30 minutes, or until all water is absorbed and rice is fluffy.
  11. Adjust seasonings and serve.
  12. Serve with fresh Cilantro, chopped tomato, baby spinach, and sliced avocado, if desired.

Smoked Balsamic Honey BBQ Sauce

I have this deep fascination with making ingredients from scratch.

What’s the big mystery? Things didn’t start off in bottles on grocery store shelves. Someone, a long time ago, used to make these ingredients for their families. So, why can’t I? My first foray into making condiments is a BBQ Sauce recipe. Admittedly, I used store bought organic ketchup and organic mustard in the recipe. But, it’s a start, right? After all, Rome wasn’t built in a day. Neither will my condiment collection be.

Another catalyst for my foray into condiment creation is the book Salt, Sugar, Fat: How the Food Giants Hooked Us by Michael Moss.

35131b60c1506ea45c3c35b128feb802

Half of my friends already think I’m a bit of an extremist when it comes to my commitment to organic, local, and sustainable foods. After reading Michael Moss’s book, however, I’m about to become even more extreme. I don’t want to buy anything that comes in a box or package ever again, unless it comes from a reputable company who’s beliefs align with my own. I highly recommend everyone read this book. Consider yourself warned, though. It will change the way you see food forever.

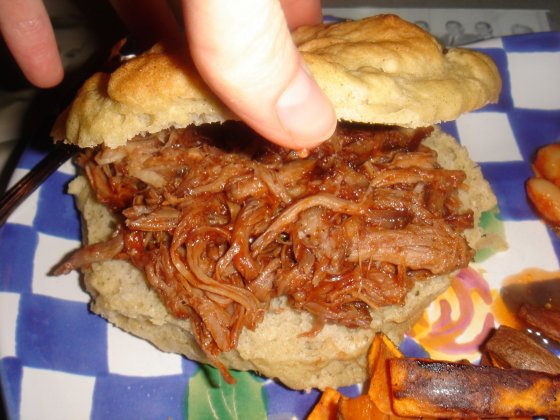
On that note… I made BBQ Sauce!!! GF Guy was home for a few days so I pulled out all the stops and made one of his favorite dishes, Pulled Pork! I used my old stand-by recipe, but this time made my own BBQ Sauce. Next time, I will make my own ketchup and mustard first. 😉

Smoked Balsamic Honey BBQ Sauce

generously adapted from this recipe on Simply Scratch

(Gluten Free, Dairy Free)

dsc017991

Ingredients:

  • 1 cup Organic Ketchup
  • 1/2 cup Aged Balsamic Vinegar
  • 1/2 cup Cinnamon Pear Balsamic Vinegar
  • 1/4 cup Organic Brown Sugar
  • 1/4 cup Organic Honey
  • 1 Tblsp Organic Yellow Mustard
  • 1 Tblsp Bragg’s Liquid Aminos
  • 1 clove Garlic, finely minced
  • 1/2 tsp Sea Salt
  • 1/4 tsp Black Pepper
  • pinch Cayenne Pepper
  • 1/4 tsp Liquid Smoke

Directions:

  1. Place all ingredients in a medium saucepan over medium heat and bring to a simmer.
  2. Reduce heat to low and allow to reduce for 20 minutes.
  3. Cool completely before storing in the refrigerator.

Ole’ Lentil Budget Bowl

This year is turning out to be the year of the “quinoa bowl meal”, and with good reason.

These meals are versatile, delicious, and SUPER CHEAP!!!!

We have all heard the complaint that it is simply too expensive to eat healthily and/or to eat gluten free. I would like to challenge any persons who says that to a cook off! At one point, my husband and I were both unemployed. Yet, we still managed to eat a plethora of fruits and vegetables, whole grains, and lean proteins. I made my own almond milk, baked my own gluten free bread, and we ate like kings on less than $150 a month.  It is possible. You just have to want to do it and put forth the effort.

Okay… I will step off my soap box now.

It is currently snowing sideways, wet, and nasty outside. I knew that dinner needed to be something spicy that would warm me from the inside out. Out came the hot sauce, cumin, and salsa, and I was on my way!

PS – Guess who finally remembered to charge her camera battery? This kid!

Ole’ Lentil Budget Bowl

(Gluten Free, Dairy Free, Vegan)

DSC09573

Ingredients:

  • 1 tsp Coconut Oil
  • 1/4 of a Yellow Onion, sliced
  • 1/4 cup Broccoli, chopped
  • 3 Tblsp frozen Peas
  • 1/2 tsp Cumin
  • 1/8 tsp Chili Powder
  • 1 cup Beet Greens, chopped
  • 1/4 cup Green Lentils, cooked
  • 1/4 cup Quinoa, cooked
  • 3-4 Tblsp Salsa
  • Salt & Black Pepper, to taste
  • dash of Hot Sauce

Directions:

  1. Melt oil in a saute pan over medium heat.
  2. Saute’ onion until translucent. Add Broccoli and cook until tender.
  3. Next, in go the frozen peas, and cook until defrosted.
  4. Sprinkle in cumin and chili powder, and add greens, cooking until just wilted.
  5. Add remaining ingredients and cook until heated through.

Pesto Quinoa & Lentils

As a continuation of yesterday’s post, we are moving on to the delicious smorgasbord that could be seen below the steamed beets!

I know you were all waiting with baited breath….

I noticed that I rarely use a plate. Every meal seems to be some sort of a bowl meal. What does that say about me? Hmm….

Anyway…. A delicious recipe made from leftover components of meals from the last week is the star of today’s post. I hope you enjoy it as much as I did!

Pesto Quinoa & Lentils

(Gluten Free, Dairy Free, Vegan)

417954_10101964472767672_364522467_n

Ingredients:

  • 1 tsp Coconut Oil
  • 1/4 of a Yellow Onion, sliced
  • 1 Carrot, chopped
  • 1/3 cup Broccoli, chopped
  • 1/2 cup Beet Greens
  • 1-2 tsp Beet Green Pesto (recipe here)
  • 1/4 cup Green Lentils, cooked
  • 1/4 cup Qunioa, cooked
  • 2 tsp good quality Balsamic Vinegar
  • 1 Tblsp Nutritional Yeast Flakes
  • Salt & Black Pepper, to taste

Directions:

  1. Melt oil in a large skillet over medium heat.
  2. Saute onion until translucent. Add carrot & broccoli and saute until tender.
  3. Add beet greens & pesto and cook until just wilted.
  4. Add remaining ingredients and cook until heated through.
  5. Top with Steamed Beets (Recipe Here)

No “Beet”ing Around the Bush

Again with the beets?!

I know, I know…. But they were on sale, 2 for 1! You wouldn’t expect me to pass up a good bargain, would you? Besides, we should all eat more beets. They are excellent for the liver, boost mental health, and are even considered by some to be an aphrodisiac. (Oh yeah… I went there.) source

I made a big batch of these steamed beets to use on salads and other meals throughout the week. I will give you the recipe for what I ate my beets on tomorrow. It was delicious, filling, and vegan! I win. 😉

Steamed Beets

(Gluten Free, Dairy Free, Vegan)

417954_10101964472767672_364522467_n

Ingredients:

  • 1 bunch organic Beets (reserve the beets tops for another recipe)
  • 2 Tblsp Low Sodium Vegetable Broth
  • 1 tsp dried Thyme
  • Salt & Black Pepper, to taste

Directions:

  1. Preheat oven to 375 degrees F.
  2. Line a square baking pan with foil.
  3. Clean & quarter beets.
  4. Place beets in the foil lined pan, and pour vegetable stock around the beets.
  5. Sprinkle with thyme, salt, & pepper.
  6. Cover pan tightly with foil, and place in preheated oven.
  7. Cook for 45 minutes to an hour, until beets are fork tender.